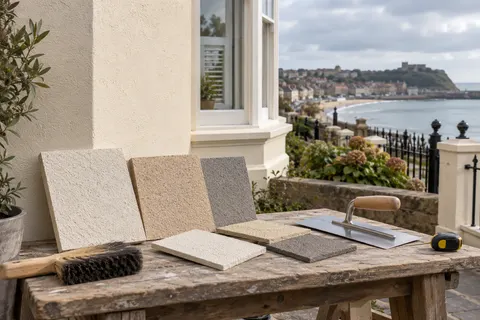
Single-wall projects
Wall rendering in Scarborough
Wall rendering covers one face of a building, such as a weather-beaten gable, a side wall or a rear extension, or a freestanding garden or boundary wall. The work follows the same layered process as a whole house, but most of the skill goes into the edges, where new render meets old render, brick, a roofline or the ground.

On this page
When one wall is the job
One elevation often gives up before the others because it takes more weather. The end wall of a terrace with no neighbour to shelter it, or a gable that faces the sea, can crack and blow while the front and back are still sound. Other common starting points are a new block extension that needs finishing, a painted brick side wall that keeps peeling, and a garden wall whose face is breaking up.
Tap-test the wall before deciding. If hollow areas are scattered in a few patches, cutting them out and patching them as render repairs keeps more sound material. If most of the face sounds hollow, or old patches of different texture cover much of it, renewing the whole elevation gives a cleaner result and leaves one new edge to manage rather than a dozen small ones.
- Set the edges Decide where new render stops against brick, stone or an existing finish.
- Prepare the background Remove loose material, repair masonry and prepare suction and surface key. Existing paint needs a specified removal or alternative treatment.
- Base coat Built up to level the wall, with mesh where backgrounds change or crack.
- Finish Matched to the rest of the house or chosen as a deliberate contrast.
- Shed the water Copings, sills and the base bead keep rain off the top and away from the bottom edge.
The usual order of work. The survey and the chosen products decide the actual steps.
How a single elevation is rendered
The old finish is hacked off the whole face, back to straight lines at the corners rather than a ragged edge part-way across. The background is repaired and, where brick or block is dense or smooth, given a bonding or stipple coat so the base coat has something to grip. Beads go on next: an angle bead at each external corner, a stop bead where new work finishes against retained render or brick, and a bellcast or drip bead above the damp-proof course.
The base coat follows, with alkali-resistant mesh bedded into it around windows and doors, where K Rend's guidance places it at stress points. The finish goes on last. Thin coats and through-coloured renders have to be completed across a face in one continuous operation, because stopping half-way leaves a visible joint; on a tall gable that means planning scaffold lifts and labour so the face can be finished without a break.
Tap-test and photograph the face and its edges
Hack off to defined stopping lines at the corners
Repair the background; bonding coat where suction or key is poor
Fix corner, stop and base beads
Base coat with mesh at openings
Finish coat across the whole face in one operation
Where new render meets the rest of the house
The edge against retained work matters more than the middle of the wall. Stopping on an external corner with an angle bead hides the change best, because you rarely see both faces in the same light. Stopping in the middle of a flat face, or against old render of a different thickness, leaves a line that will always show. If the new face stands proud of the old, check how it meets the roof verge, downpipe brackets and any window that is not being replaced.
Colour is the other edge. New render beside an older face will not match exactly, even in the same named colour, because the old surface has weathered. Decide before work starts whether that difference is acceptable or whether the adjoining walls should be cleaned or recoated at the same time to tie the house together.
Garden and boundary walls
A freestanding wall is exposed on both faces and along its top, so the coping and its drips belong to the render job. Ask what coping is proposed, whether it oversails both faces with a drip, and where the damp-proof course sits near the ground, because the render should stop above it on a bead. Render carried down to the soil keeps the base of the wall wet.
A retaining wall holding back soil is a different case again, because ground moisture reaches it from behind. Have its drainage looked at before deciding whether render belongs on it at all.
Access and the first winter
On Scarborough's taller terraces a single gable can still mean scaffold three to five storeys high. If it stands on the pavement, the scaffolding company must register with North Yorkshire Council, apply for a licence with at least seven days' notice and normally keep the scaffold on the footway rather than the road or a back street. Allow for that notice before fixing start dates.
Look at the new wall after heavy rain in its first winter. Dark patches that stay wet for days, cracks opening at window corners, or water running behind a downpipe are worth reporting while the work is fresh. K Rend advises leaving a crack to stabilise before it is repaired, so record its length and width with dated photographs.
Common questions
Can I render the front and leave the sides as brick?
Yes, if the stopping edges are designed, usually with an angle bead on each front corner so the render returns neatly. In a conservation area or the National Park, rendering brick that was never rendered is a change of material, so ask the planning authority first.
Should a garden wall be rendered on both sides?
Often, because both faces get wet, but the coping matters more than the render. A sound coping with drips keeps water out of the top, which is where a rendered boundary wall usually starts to fail.
See housing and planning information for Scarborough and nearby places, including the source and geography behind each figure.