Whole-house rendering
House rendering in Scarborough
Re-rendering a whole house means taking every elevation back to a sound background and building a new render system over it, from the bead above the damp-proof course to the stop under the eaves. It is the right scale of job when failure is spread across several walls, or when you want one consistent finish that a coat of paint cannot give.

On this page
When the whole house needs doing
Walk round the house and tap the render at reachable height with a knuckle or the handle of a screwdriver. Sound render gives a solid knock; a hollow, papery note means that coat has let go of the wall. A few hollow patches on one elevation point to render repairs. Hollow areas on several faces, cracks crossing more than one wall and a patchwork of earlier repairs in different textures are the usual reasons to re-render everything instead of chasing individual defects.
A tired-looking exterior is not, on its own, a reason to strip the lot. If the render is sound but faded or streaked, cleaning or a colour change keeps the existing coats. If only the gable that takes the weather has failed, single-wall rendering may be enough. Doing every elevation makes most sense when failure is found on most faces, or when the house is being scaffolded all round anyway for roof or window work.
- Scaffold and protection Windows, doors, paths and planting are covered; downpipes, lights and satellite brackets come off.
- Old finish tested or removed Failed render is removed; the survey decides whether any sound areas can remain within the specified system.
- Masonry repairs and beads Cracked bricks and open joints are repaired; corner, stop and base beads are fixed.
- Base coats Sand-and-cement scratch and float coats, or a manufacturer basecoat with mesh.
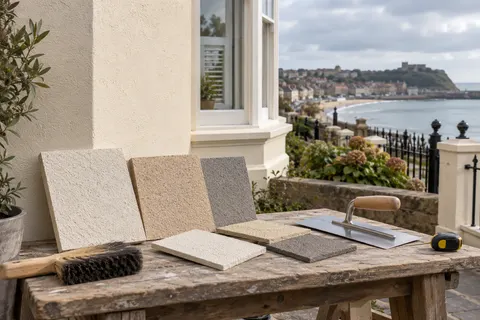
- Finish coat A painted, scraped or thin-coat coloured finish, applied in suitable weather.
- Fittings and junctions Fittings are refixed through the new surface; sills, roofline and abutments are sealed.
The usual order of work. The survey and the chosen products decide the actual steps.
What happens to the walls
Scaffold goes up round the whole house, because each elevation is worked from the top down. Downpipes, satellite brackets, lights and alarm boxes come off and are labelled for refixing. The old render is hacked off back to brick or block, and the bare wall is checked: loose bricks, cracked lintels, open joints and soft areas are repaired before anything new goes on.
Beads are fixed next, because they set the finished line and thickness: a bellcast or drip bead along the base so the render stops above the damp-proof course instead of bridging it, angle beads on external corners and stop beads where render meets frames and soffits. K Rend's detailing notes also call for reinforcing mesh in the base coat at the head of each opening, lapped at least 300mm onto the surrounding wall, and a drip of at least 40mm under sills.
Scaffold erected; fittings removed and labelled
Old render hacked off; background inspected and repaired
Beads fixed at the base, corners, reveals and eaves
Base coat applied, with mesh at openings and stress points
Finish coat applied face by face without stopping mid-panel
Fittings refixed, frames sealed, high-level work checked before the scaffold is struck
Scarborough houses and what gets rendered
The council's residential design guide describes the town's inter-war and post-war suburbs, including North Leas, Newlands and much of Newby, as mainly red brick, some with white rendered upper floors. On a house like that, re-rendering the whole house may really mean renewing the upper-floor render while the brick ground floor stays as it is. Rendering the brick as well changes the look of the house and can change the planning position.
Older parts of the town differ again: the same guide records brick and render buildings in the Old Town and stone or white-rendered terraces on South Cliff's main streets. If one elevation of your house faces the sea and takes driving rain, it can justify a tougher specification or closer maintenance than the sheltered rear, even though both sit in one contract.
Planning and Part L checks before you commit
Two rules catch people out. First, government guidance on householder permitted development says that in a conservation area or a National Park, cladding any part of a house with render, pebble dash or stone is not permitted development and needs a planning application. If the house is inside the North York Moors National Park, the National Park Authority deals with it. Whether renewing existing render counts is a question to put to the authority before you change the finish.
Second, Approved Document L treats rendering the outside of a wall as renovating it. Where more than half of an elevation is re-rendered, or more than a quarter of the whole envelope, the guidance expects the wall to be brought up to 0.30 W/m²K if that is technically, functionally and economically feasible, with allowances for listed and conservation-area buildings. That is why external wall insulation often comes up during a whole-house re-render.
Weather, drying and looking after it
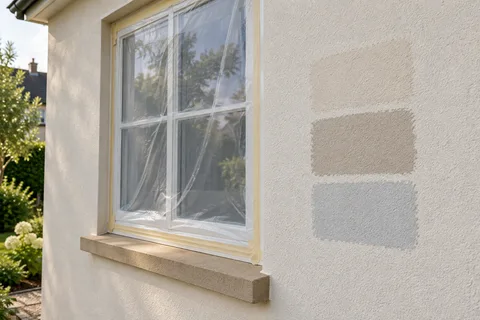
Every system has weather limits. K Rend's data sheet for its K Mono monocouche rules out application below 5°C or above 30°C, or when frost is forecast within 24 hours, and its silicone thin coat should not go on in strong sun or wind. With the house scaffolded all round, sheeting keeps rain and wind off fresh work, and the order of elevations can follow the weather.
Once finished, a rendered house needs a look round each year more than anything else. Keep gutters and downpipes clear: SPAB notes that render can fail locally where a leaking fitting concentrates water. K Rend suggests light cleaning after a few years with a pressure washer on a wide fan setting and mild detergent, working from the top down, and stainless steel fixings for anything later screwed into the render.
Common questions
Does all the old render have to come off?
Not always. K Rend lists sound sand-and-cement render as a suitable background for some of its finishes once prepared. Hollow, cracked or flaking areas come off; the tap test and a few opened areas decide the rest, wall by wall.
Will every elevation end up the same colour?
With a through-coloured finish, each face is completed in one operation, ideally from one batch, so the colour stays even. A patch added years later will usually show, because the original surface has weathered.
See housing and planning information for Scarborough and nearby places, including the source and geography behind each figure.