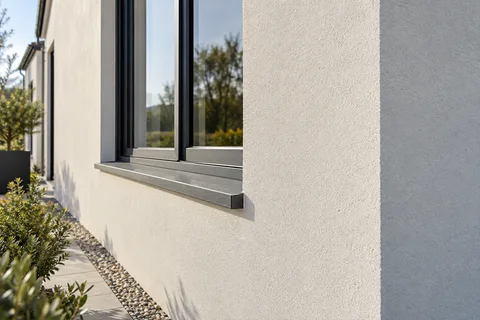
Silicone render systems
Silicone rendering in Scarborough
Silicone render is a thin decorative coat that goes over a base coat rather than straight onto bare masonry. It is coloured all the way through and sheds water, which is why it is often chosen for exposed modern walls and for external wall insulation. What sits underneath it decides whether it lasts.

On this page
What silicone render actually is
Most products sold as silicone render are ready-mixed pastes in tubs. K Rend describes its Silicone TC as an organic resin render combining a silicone resin emulsion with an acrylic dispersion; it contains no cement and includes a biocide to slow mould and algae. It is spread to the depth of its largest grain, so the TC15 grade is about 1.5mm thick with a fine texture, and TC30 about 3mm with a coarser one.
Because it is so thin, silicone render cannot true up a wavy wall, fill hollows or bridge cracks in the background. That work is done underneath, by a polymer-modified base coat with alkali-resistant mesh bedded in it. Think of the system as three layers: a base coat that levels and reinforces the wall, a primer tinted to the finish colour, and the thin silicone coat on top.
- Sound background A background accepted by the specified system. Keeping old render requires a system-specific assessment of its bond and condition.
- Beads Corner, stop and base beads set the edges and straight lines.
- Basecoat with mesh Glass-fibre mesh embedded in the basecoat resists cracking.
- Primer Where the system requires it, tinted towards the finish colour.
- Silicone finish A thin, through-coloured, water-repellent coat that forms the texture.
Wall on the left, finish on the right. Not to scale: coats, thicknesses and primers follow the chosen manufacturer’s system and the condition of the wall.
When it suits the wall, and when it does not
Silicone works on solid modern backgrounds. K Rend lists blockwork, brickwork, sand-and-cement render, concrete, render boards and insulation panels as suitable after preparation. It is a good fit for a sea-facing extension or a new gable where you want a crisp, even colour and a surface that rain runs off rather than soaks into, and its low tendency to pick up dirt helps pale colours stay clean.
It is not the usual answer for an older solid wall of stone or soft brick that relies on drying out through its face. For walls like that, SPAB recommends a weaker, more permeable lime render without cement. Nor should it go over a wall that is wet for another reason, such as a leaking gutter or old render bridging the damp-proof course: deal with the water first.
How it goes on
On a refurbishment the old render is either removed or, if sound, cleaned and kept as the background. Beads are fixed at corners, reveals and the base, then the base coat goes on with mesh embedded, especially around windows and doors. K Rend's data sheet asks for a fresh base coat to be left at least 14 days before the thin coat, which surprises owners expecting the job to run straight through.
A primer tinted to the finish is then rolled on and left 24 hours. The silicone coat is laid on with a stainless steel float to the depth of the grain and rubbed up in small circles with a plastic float to raise the texture. Each face has to be completed in one go, working to a wet edge, so breaks are planned at corners, downpipes or bead lines where a joint will not show.
Remove or prepare the existing surface
Fix beads at corners, reveals and above the DPC
Base coat with embedded mesh; at least 14 days before the finish (K Rend Silicone TC)
Tinted primer; 24 hours to dry
Silicone coat spread to grain depth and textured
Each face completed to a wet edge without stopping
Weather on an exposed frontage
The same data sheet sets a 5°C minimum for both the air and the wall, and rules out strong sunshine, strong wind, damp walls and frozen walls. On an elevation that catches wind off the sea, wind can be the deciding condition, because it dries the coat before it can be textured evenly. Sheeted scaffold is the usual answer, and it also keeps rain off the fresh finish, which the sheet says must be protected.
Ask how the programme handles a wet spell between base coat and finish. Fourteen days is a minimum, and the primer and finish still need a dry wall above 5°C, so a mixed autumn can stretch the job. A delay is better than a finish rushed onto a cold or damp wall.
Cleaning and repairs later on
A silicone finish resists soiling, but algae can still grow on a face that stays damp, under trees or behind a hedge. K Rend's maintenance advice is to clean after a few years with a pressure washer on a wide fan setting rather than a high-pressure jet, using clean water and a little mild detergent from the top down, and to treat algae with a biocide.
Small knocks can be repaired with matching material, though a repair may show slightly against weathered render. Keep the product name, grain size and colour reference. Anything screwed into the wall later, such as a light or satellite bracket, should be stainless steel, because rust running from cheap brackets stains the finish.
Common questions
Is silicone render the same as silicone paint?
No. Silicone render is a textured coat containing aggregate, laid over a base coat. Silicone masonry paint is a thin coating used to [recolour existing render](/respray/); it changes the colour but not the texture.
Can silicone render go on in winter?
Only when the air and wall are at least 5°C, the wall is dry and not frozen, and the work can be kept out of rain while it dries, which is K Rend's rule for its Silicone TC. Cold, damp weeks can pause the job.
See housing and planning information for Scarborough and nearby places, including the source and geography behind each figure.