Cracked, loose or damaged render
Render repairs in Scarborough
A render repair cuts out the damaged part of a wall, fixes whatever caused it, and patches the gap with a compatible material finished to match the surrounding texture. It is the right answer when the damage is local and the rest of the render is sound. It goes wrong when the patch is made before the cause is found.

On this page
Finding the real extent
The visible crack is rarely the whole problem. Tap the render around it: sound render knocks solid, while render that has come away from the wall sounds hollow and may bulge slightly. Mark the hollow area in chalk; that, not the crack, is the size of the repair. Above ground floor, the same check needs ladders or scaffold.
Read the crack pattern too. K Rend groups render cracks into structural cracks, settlement and shrinkage cracks, stress cracks at the corners of windows and doors, and hairline cracks in the surface only. IHBC adds that long cracks running in one direction may reflect structural movement, which should be investigated before any repair. A hairline craze is cosmetic; a stepped crack through a gable may not be.
- Map the damage Tapping finds hollow areas; cracks and their likely cause are noted.
- Cut back Failed render is cut out to a sound edge, usually squared off.
- Fix the cause Leaking gutters, sills without drips or render below the DPC are dealt with.
- Rebuild in coats Using a material compatible with the surrounding render and masonry.
- Blend the finish Texture is matched; colour may need a coating over the wider area.
The usual order of work. The survey and the chosen products decide the actual steps.
Water first, render second
Many local failures have a water source. A leaking downpipe joint, a gutter overflowing at one corner, a sill without a drip or render carried down over the damp-proof course can soak one area until it lets go. SPAB's advice on rainwater fittings notes that render may fail locally, particularly cement coverings that draw moisture in through hairline cracks.
If the cause is a fitting, have it repaired before the render. If it is the detail at the base or under a sill, the repair should change that detail: a bellcast bead so the render stops above the damp-proof course, or a sill with a proper drip, for which K Rend's detailing notes give a 40mm minimum. Patching without changing the cause usually means patching again.
How a patch is made
The damaged render is cut back to sound, well-bonded material with neat edges rather than a feathered outline. The exposed wall is brushed down and any loose brick, block or mortar repaired. The patch is then built up in coats to the thickness of the surrounding render, in a compatible material: cement-based on a modern wall, lime on a lime-rendered one.
Where cracks keep returning at window corners, mesh in the base coat across the corner helps, as it does in new work. K Rend also advises leaving an active crack as long as possible to stabilise before repair, so a crack that is still opening may need monitoring first. The finish is then worked to match the existing surface: scraped, floated, roughcast or dashed.
Tap-test and mark the hollow area
Fix the water source or change the detail
Cut back to sound render with clean edges
Repair the exposed background
Rebuild in coats to the existing thickness
Texture to match; repaint the whole face if it is painted
How close will the patch match?
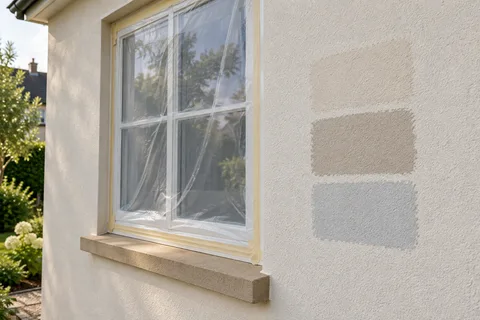
A patch seldom disappears completely. The surrounding render has weathered, picked up dirt and may have been painted, while the new material starts fresh. Through-coloured renders such as monocouche can show a change of shade, whereas painted render hides a repair best because the whole elevation can be repainted afterwards. K Rend supplies a coloured filler and an evening-up coating for its own finishes for exactly this reason.
Decide in advance whether a visible patch is acceptable or whether the repair should be followed by cleaning or recolouring the elevation. The answer is often different for a front wall facing the street and a rear wall behind the yard.
Safety and older buildings
Loose render over a doorway, path or pavement can fall without warning. Keep people away from it and have it made safe; on a building beside the street, that may mean scaffold or a barrier, and scaffold on the footway needs a North Yorkshire Council licence applied for by the scaffolding company.
On an older solid wall the repair material should be lime. IHBC warns against patching weak historic lime with cement or strong hydraulic lime and recommends a matching lime instead. See lime rendering for how lime coats are built up and protected while they cure.
Common questions
Is a crack in render always a problem?
No. Fine hairline crazing in the surface is common and largely cosmetic. Cracks that are wide, growing, stepped or surrounded by hollow render need inspecting, because water gets in behind them.
Can I fill a crack myself with exterior filler?
A filler may seal a hairline crack in a painted finish, but it will not reattach hollow render or deal with the cause. If the render around the crack sounds hollow, the area needs cutting out and repairing properly.
See housing and planning information for Scarborough and nearby places, including the source and geography behind each figure.